Overview
If you’ve received a Sales Link from The Gifted Company, you can now place your order directly online — no need to send us the manual order form anymore.
This process makes it faster and easier to complete your order while ensuring all details are correctly captured for invoicing and delivery.
Open your Sales Link
Click the Sales Link provided in the email from our team.
It will take you to your personalized order page, where all relevant details (such as brand, denomination, and product type) have already been prefilled.
💡 Each Sales Link is unique and created specifically for your organization. Please do not share it externally.
Step 1 – Select the gift card details
When you open the Sales Link, you’ll see the order page shown below.
Here you can choose who the gift card is for, select the amount, and set the quantity of cards required.
Follow these steps:
Choose the recipient
Select For someone else if you’re purchasing the gift card on behalf of someone.
Select For me if you’re purchasing the gift card for yourself.
Select the gift card amount
Use the dropdown menu/type the value to choose the desired value (e.g., SEK 550, SEK 1000).
You can add more denominations by clicking Add another.
Set the quantity
Use the plus (+) or minus (–) buttons to enter the number of gift cards you’d like to order.
💡 Tip: You can mix and match different denominations by selecting Add another, which allows you to include multiple gift card values within the same order.
Step 2 – Choose how you want your delivery to happen
After selecting your gift card amount and quantity, you’ll be asked to choose how you want your gift cards to be delivered.
You can select from three delivery methods: SMS, Email, or Postcard.
Delivery options
SMS
Gift cards are sent as digital links via SMS directly to each recipient’s mobile phone.
The recipient receives a text message with a secure link to open their gift card instantly.
Email
Gift cards are sent digitally via email to each recipient’s inbox.
Recipients can unwrap their gift using the link included in the email.
Under Email delivery, you can also choose:
Digital PDF gift card – delivered as a downloadable PDF file (ideal for printing or forwarding internally).
Gift card link – sent as a digital link that can be opened directly online.
Postcard
A premium physical gift card is printed and packaged in an elegant envelope.
Cards are delivered via post within approximately 5 business days.
💡 Note: The physical gift card (postcard) option is not available for multiple recipients. If you are sending gift cards to several recipients, please select Email or SMS delivery instead.
Step 3 – Preview and customize your message (Optional)
Once you’ve chosen your delivery method (Email or SMS), you’ll be able to preview and customize the message that will be sent together with your gift cards.
This allows you to add a personalized touch or include your organization’s internal message before sending the gifts.
How to customize your message
Email delivery
You’ll see a preview of your email message.
Click the Edit text button to modify the content of the message that your recipients will receive.
You can add your own greeting, include your company name, or add a short note (e.g., “Thank you for your contribution this year”).
Once edited, the updated text will appear in the email sent to all recipients.
Example: “You have received a Gifted Plus Sverige gift card from [Your Organization Name]. We hope you enjoy your gift!”
2. SMS delivery
If you selected SMS, you’ll see a preview of the SMS message.
Click the Edit text button to personalize your message content.
You can include a short greeting, your organization’s name, or a campaign message.
Example: “You’ve received a Gifted Plus Sverige gift card from [Your Organization Name]! Tap the link below to unwrap your gift.”
💡 Tip: Keep your message concise and professional — recipients will see this text exactly as it appears in your preview.
Step 4 – Customize your PDF gift card design (Optional)
If you’ve chosen the Digital PDF or Postcard delivery option, you’ll have the opportunity to customize the appearance of your gift card before finalizing the order.
You can personalize both the front image and the greeting text that appear on your PDF gift card.
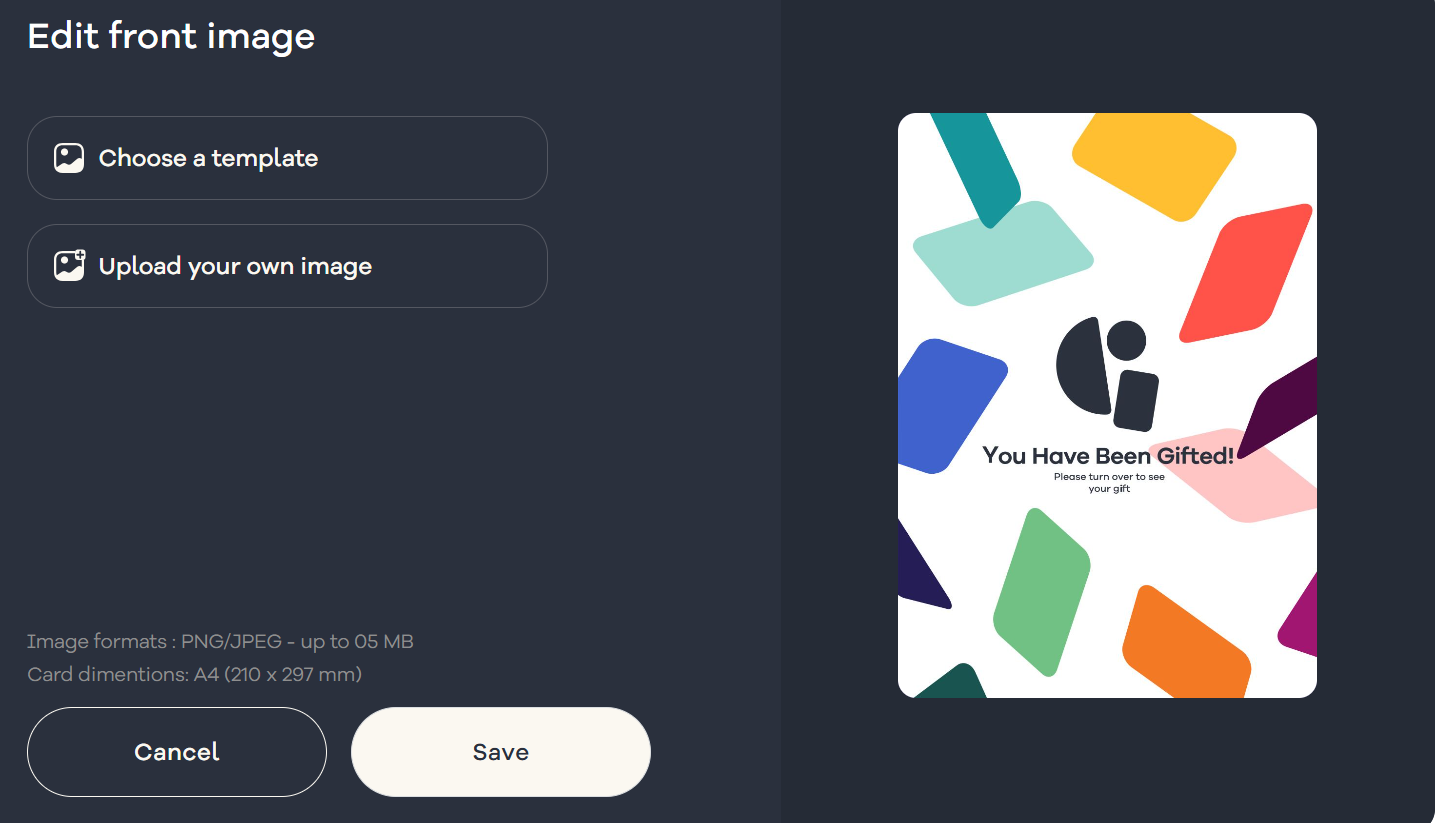 1. Edit the front image
Click on the front page preview or the edit icon to open the customization menu.
You’ll see two options:
Choose a template – Select from a range of pre-designed front images available in the Gifted library.
Upload your own image – Use a personalized design or company-branded image.
*Supported formats: PNG/JPEG, up to 5 MB in size.
*Recommended dimensions: A4 (210 × 297 mm).
💡 Tip: Using your organization’s logo or seasonal image helps make your PDF card more personal and on-brand.
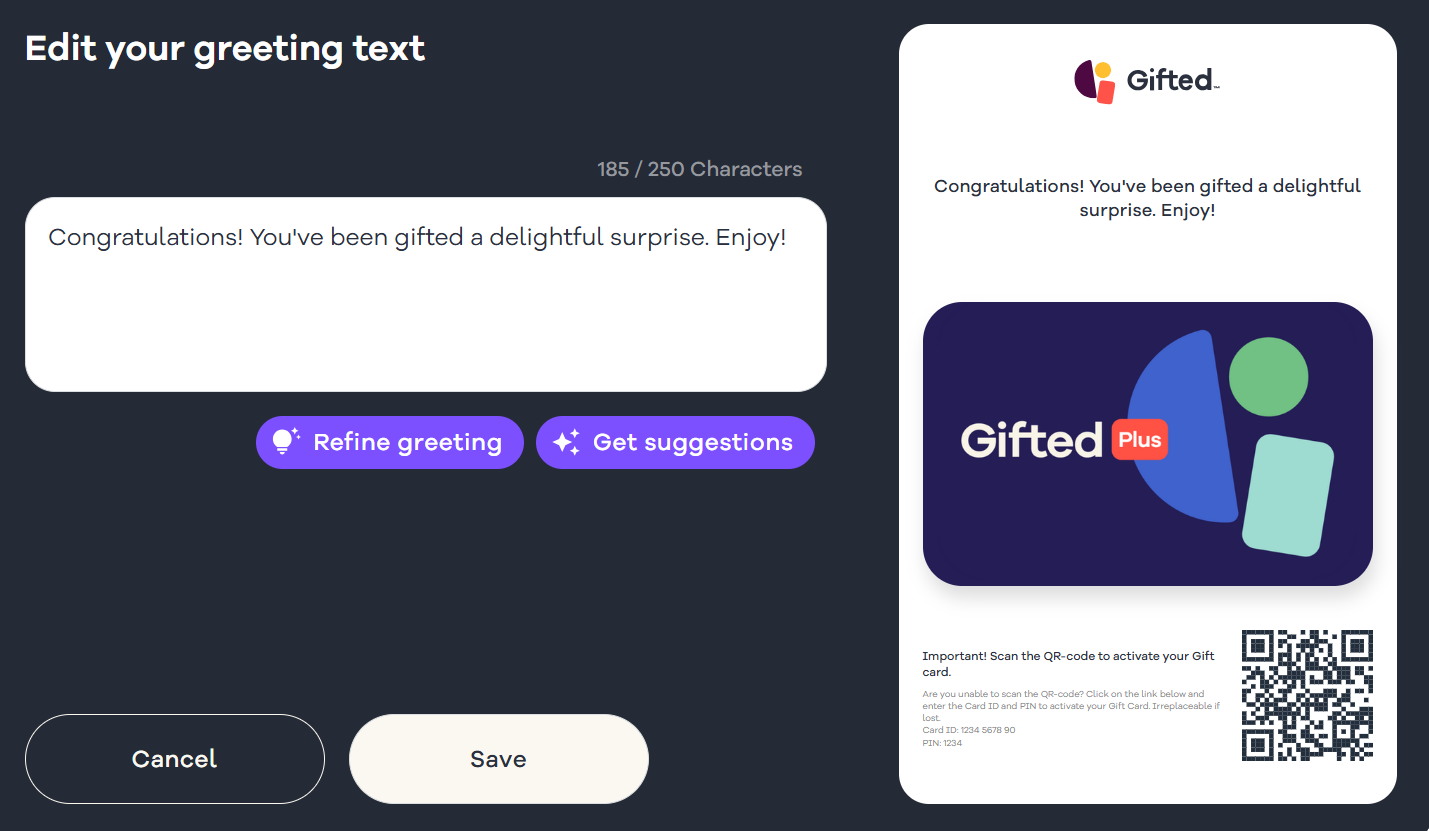 2. Edit the greeting text
Click on the second page preview or Edit Greeting Text button.
Here you can type your own personalized greeting message to include with the gift card.
You’ll also find two helpful tools:
Refine greeting – Automatically improves the flow or tone of your text.
Get suggestions – Provides AI-generated ideas for greetings.
Once you’re happy with the message, click Save to apply your changes.
Example:
“Congratulations on your achievement! We appreciate your dedication and hope you enjoy this gift.”
Step 5 (Optional) – Create a unique unwrapping experience
You can make your gift card delivery more memorable by adding a custom unwrapping experience.
This feature allows you to include an image, video, or short greeting that appears to the recipient when they open their gift card — whether it’s delivered via SMS, Email, or Postcard.
How to customize the unwrapping screen
Click on the mobile preview screen or the Edit icon to open the customization options.
Choose how you want the unwrapping experience to look:
Choose a template – Select from predesigned Gifted unwrapping animations.
Upload your own image – Use a personalized image (PNG/JPEG, up to 20 MB).
Upload video – Add a short video message to make the gift reveal more engaging (MP4 format, up to 75 MB).
Add text – Include a simple greeting or thank-you message.
💡 Note: The unwrapping message or animation will appear for all delivery methods — Email, SMS, and Postcard — when the recipient opens their gift card.
Step 6 – Add recipients and schedule delivery
Once you’ve customized your message and design, the next step is to add the recipient details and optionally schedule your delivery.
This section allows you to specify who will receive the gift cards and when they should be delivered.
1. Choose the recipient type
At the top of the screen, you’ll see two options:
Single – Select this option if:
You are sending the gift card to only one recipient, or
You want to receive all gift cards in one email address or contact number (for example, if your organization will distribute them internally).
Multiple – Choose this option if you want to send gift cards to several recipients.
You can upload a recipient list or enter multiple email addresses to send the cards directly to each individual.
2. Enter recipient information
Depending on your selected option, fill in the required fields:
⚠️ Make sure that all recipient details are accurate — the gift card will be sent directly to the provided contact information.
3. Schedule the delivery (optional)
If you’d like the gift cards to be sent on a specific date rather than instantly:
Click Schedule delivery.
Select the date and time you want the order to be delivered.
Confirm your selection before proceeding.
If no date is selected, your gift cards will be sent immediately after placing the order.
Example use cases
Single delivery: Sending all 100 gift cards to your own email to forward internally.
Multiple recipients: Sending each recipient their own personalized digital gift card automatically.
Scheduled delivery: Planning a delivery date in advance (e.g., for a holiday campaign or staff appreciation day).
Step 8 — Add Buyer and Organization Details
On the final page, you’ll be asked to enter the buyer’s details and your organization’s billing information.
Required fields include:
First Name & Last Name
Mobile Number & Email Address
Company Name
VAT Number
Address
Invoice Reference
Order Number
💡 Tick “Add company VAT and invoice details” to unlock the organization fields if they aren’t visible.
Add Your Invoice Reference
Make sure to enter your Purchase Order Number (PO number) in the “Invoice Reference” field.
This is mandatory for public sector and tender customers to ensure the order can be properly approved and invoiced.
⚠️ Orders without a valid invoice reference may be delayed or rejected.
Completing the Order
Once all information is filled in, click Pay Now to finalize your order. (After selecting the payment Method Invoice)
You’ll receive a confirmation email shortly after, and your invoice will be sent according to the billing details provided.
Your order is now complete! 🎉
you’ll receive a confirmation email along with your gift card. (If the card is not Scheduled)
If you need any assistance or have questions about your order, feel free to reach out to our support team through the below contact us form — we’re happy to help.